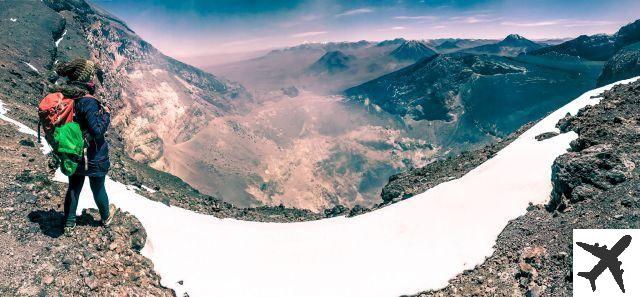
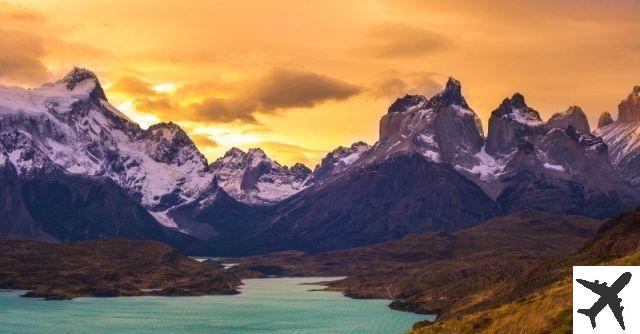
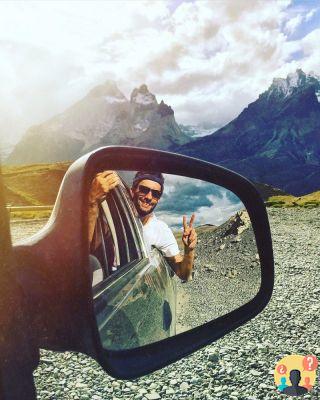
O Torres del Paine Park is located in Chilean Patagonia, in the extreme south of the country, is considered one of the most incredible destinations to visit in South America. It has beautiful landscapes, surrounded by mountain ranges, mountains, glacier lakes and with several options of trails.
It is a great destination for backpackers and adventurers who enjoy camping and trekking, as well as for those who prefer to relax in luxury hotels and enjoy nature.
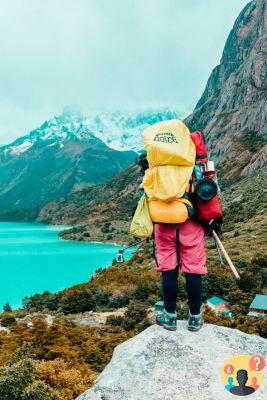
My reason for visiting the park was for the first option. I wanted to make a trekking. There are two main routes within the park, the first and shortest is the Circuit W, with a duration of 4 days. The second is Circuit O and takes between 8 and 10 days to complete. Both trails are magnificent and you can enjoy very different landscapes. A third option is the one-day routes.
How to get?
The best way to get to Torres del Paine is to fly to Punta Arenas, the nearest city with an airport. All flights departing España connect in Santiago first. From São Paulo the trip takes about 4 hours, remembering that to enter the Chile no visa required.
From the Chilean capital, you can also take a plane for another four hours towards the south, to Punta Arenas. The next stage is along the road. By bus, you can go from Punta Arenas to Puerto Natales (225km – 3 hours), the city that is the gateway to the park.
I took this bus trip through the company Buses Fernandes. I bought the ticket shortly before boarding, without any problems, and paid 12 Chilean pesos (20 dollars) for the round trip tickets.
From Puerto Natales, it's super easy to get to Torres del Paine Park. Several bus companies make this route, usually twice a day, in the morning and in the afternoon. The ticket can be purchased at the bus station in Puerto Natales.
To enter the park, you must pay a fee of 18.000 Chilean pesos (equivalent to 38 dollars) in high season and 5.000 Chilean pesos (equivalent to 10 dollars) in low season. The fee is paid only once and you can stay in the Torres del Paine park as many days as you like. An important tip: if you leave the park and want to return the next day, go to reception and stamp your ticket.
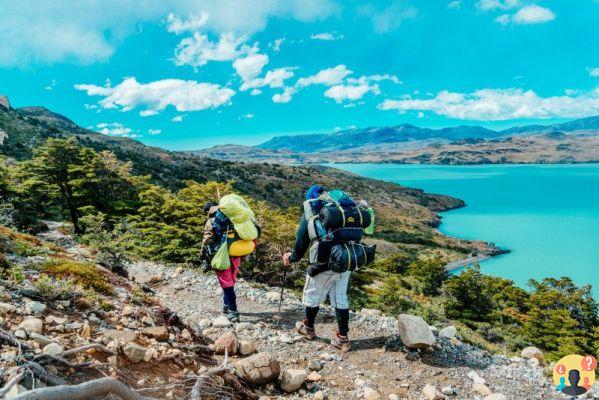
On my trip to the park, I chose to do the Circuit W. In it, there were two starting options, from west (from Refugio Paine Grande) to east (Hosteria Las Torres) or in the opposite direction, from east to west.
The decision basically comes down to whether you want to leave the big attraction — as torres del paine — for the last day, or if you prefer to start the walk through the towers. In terms of walking, the east-west route is also a little easier, with a lot of uphill (but don't worry, there's enough uphill for both sides).
I chose to start on the west side for two main reasons. First I wanted to spend a night at the camping Lago Pehoé, a region outside the circuit W, but very close to the starting point on the west side of the circuit. As I slept there the first night, it made much more sense to start the walk right there.
The second reason was that I wanted to leave to see the Towers at the end, serving as a motivator and a reward for the long walk.
The itinerary inside Torres del Paine
Dia 1 (4km)
I took the 14:30 pm bus from Puerto Natales and arrived at the park around 17:30 pm. All passengers had to get off at the reception (Porteria Laguna Amarga) of the park to pay the entrance fee and also inform the itinerary and the length of stay within the park. Torres del Paine Park.
Who chose to do the circuit W east to west — from Las Torres to Paine Grande — has already stayed there and taken another bus to Hosteria Las Torres. As I chose to start on the other side, I stayed on the same bus, which continued for about 40 minutes until the Pudeto Nursery.
Pudeto is the place where tourists take the catamaran to reach Refugio Paine Grande, starting point of the W from west to east. In my case, I didn't take the catamaran that day, because I chose to spend a night at Camping Lago Pehoé, a few kilometers from Pudeto. The accommodation fee at Pehoé was 10.000 Chilean pesos (15 dollars). The place is magnificent, with some trail options. The Cóndor viewpoint (30 minutes walk) offers a very nice view.

Trip 2 (+-18km)
I woke up at 5:30am to photograph the sunrise at Pehoé Lake, then I packed up and headed out to catch the morning catamaran. It took 30 minutes on the boat across the lake to reach Paine Grande, the starting point of the W. I set up the tent, left the backpack at the campsite and went for a walk near Refugio Grey, but as the weather was bad I decided to go back first.
Some people choose to go with their stuff to Refugio Grey, sleep there and come back the next day. I chose to go and come back on the same day, so I walked with a lot less weight.
Trip 3 (+-12km)
That second day of circuit W I walked to the French camp, on the way I stopped for lunch at the Italian camp. Due to bad weather, I did not go up to the British viewpoint or Valle Frances, as the trail was closed.
It was a pleasant trail to do, the bad thing was that the weather was very closed, so it was not possible to appreciate the landscapes that the place offers so much. When the weather is good people leave the backpack at the Italian Camp and go up to Britanico and Valle Frances.
Dia 4 (+-16km)
On that day the journey was long, the most tiring day, numerous ascents and descents, and the fact of taking the backpack the whole day made me more tired. I went from the French camp to the Chilean camp. I stopped for lunch at campsite the horns, super nice place, I thought it was better than the French one where I had spent the night. I arrived at the Italian campsite around 5pm.
Trip 5 (+-12km)
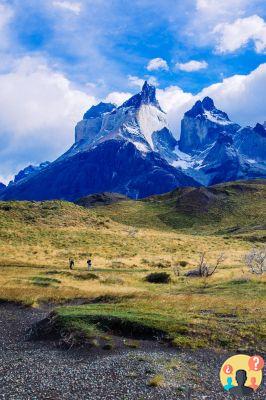
That day I woke up early in the Chilean camp, had breakfast, left my backpack at the camp and went out to hike to the famous Torres. It took two hours of walking to get there, including the last kilometer with an incline of 400 meters – it is probably one of the most strenuous parts of the entire journey.
I stayed in the Towers for some time, regaining energy, ate something and went down again. It took another two hours to get back to the camp. I took the backpack and went down another two and a half hours to the end of the W, where I took the transfer to the Laguna Amarga entrance and then the bus to Puerto Natales.

The places to sleep:
• Refugio Paine Grande: Paid campsite owned by Vertice Patagonia, it has a chalet where people gather to cook, has a hot bath and if you don't want to camp, you can stay in their refuge.
• Refugio Grey: It is a few minutes away from the Gray Glacier. It has a good structure and it is a paid camping of the company Vertice Patagonia. There is a place to camp or a dormitory for those who prefer.
• Italian Camp: Free camping, little infrastructure, just a small place to cook that is half open and doesn't have a hot shower. To sleep there you have to book the same day early with the CONAF staff.
• French Camp: Paid campsite from Fantastico Sur. The good thing about it are the wooden platforms to place the tents. It has a decent bathroom, but the place to cook is quite small.
• Horns: Possibly the most famous of the route, Cuernos is a paid campsite, run by Fantastico Sur, located an hour away from the French campsite. It has a 24-hour hot bath, a place to cook, they sell meals (breakfast, lunch or dinner) and for those who want it, they have the option of staying in refuge so they don't have to sleep in the tent.
• The Chilean: Paid campsite of the company Fantástico Sur, located about two hours from Hotel las Torres, where many people start their trekking. Hot water 24 hours a day, exclusive bathrooms and for those who want to have refuge, however it is good to book well in advance.
• Torres Camp Site: Similar to the Italian camp, it is a free campsite with little infrastructure. Its great advantage is the fact that it is only an hour away from Las Torres.
• Torres Camping and Refuge: Paid campsite of the company Fantástico Sur. It has space for 150 tents. Tent, sleeping bag and insulation rental available, as well as all other fantastic sur company camping. Hot water 24 hours a day. You have the option of sleeping in the refuge if you don't want to camp.
Important tip: If you don't want to camp in tents, book the shelters and campsites well in advance, especially in high season. As there are few spaces in each of these places, they fill up quickly.
Essential equipment for trekking:
- windbreaker jacket.
- waterproof sneakers suitable for trekking.
- second skin pants.
- second skin t-shirt.
- flashlight (headlight is better, as your hands are free).
- Gas for cooking (you can buy it in punta arenas or puerto natales)
- Scarf to protect face/ear from the wind.
- Comfortable pants (don't bring jeans, if it rains you'll carry several extra pounds)
- At least a pair of shorts.
- water canteen.
- plastic cutlery.
- sunglasses;
- If you are sensitive to the sun, sunscreen.
- Trekking poles (can make a lot of difference!)
- Toilet paper.
If staying in a tent:
- sleeping bag.
- thermal insulation or very thin air mattress.
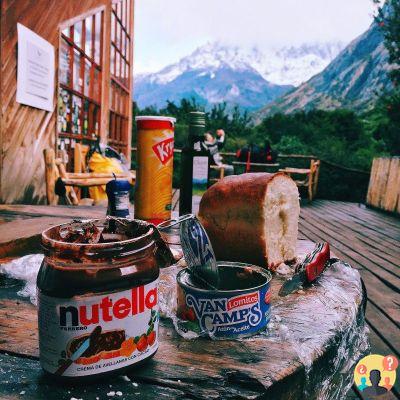
Suggestions of what to buy to eat:
- atum.
- enough bread.
- Ramen noodles.
- nutella or something sweet to put on bread.
- chocolate/granola bars.
- powdered juice.
- fruit for the first few days.
- rice.
In general: food that doesn't weigh that much, is non-perishable and is easy to make.
What is possible to rent in Puerto Natales:
- Stove (it's tiny, don't worry).
- Bot the draw.
- Pan.
- Cutlery.
- Jacket.
- Tent.
- Trekking pole.
# Here's the tip:
I rented my stuff at Hostel Lili Pathogenic and recommend!
Address: Arturo Prat Street 479. Puerto Natales – Chile
South America travel insurance
Taking out travel insurance for South America is an excellent way to ensure a smooth trip and avoid worries. Having the assistance of insurance gives you the peace you need to enjoy your destination and know that you have support if you need it. Also enjoy our Insurance Promo discount coupon. - SEE PRICES
Read More
- Complete Itinerary in Santiago de Chile – Everything you need to know
- How to Visit the Atacama Desert – Tips for Planning
- What to Do in the Atacama Desert – 6 Must-See Tours
- How to Climb the Láscar Volcano in the Atacama Desert – Everything You Need to Know
- Things to do in Nevados de Chillán, Chile – Tips for Planning
- Valle Nevado – Best Tips to Enjoy
- What to do in Valle Nevado – 9 Tips on How to Enjoy
- Where to Eat in Valle Nevado – 12 Options to Try
- Where to Stay in Valle Nevado – Best Hotels